Friday, June 20, 2014

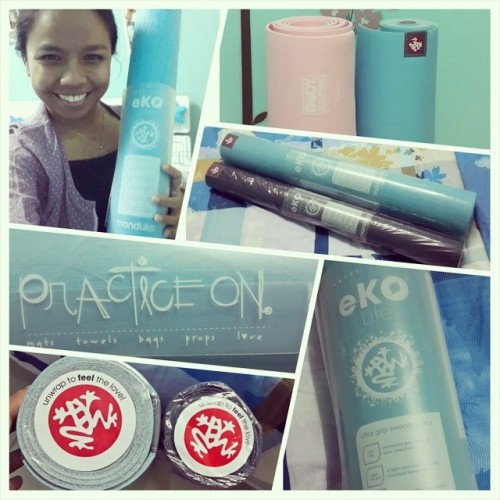
Since I order my Manduka mat, I've been thinking to make my own yoga mat bag ^^ I don't really like my old yoga mat bag that got from my old mat. It have a hole on the top and use small strap, it hurts when you have heavy mat XD. So, I google it, trying to find inspirations and nice free pattern. So finally, I decide to use free pattern from Nigella Yoga Bag. You can just follow the instructions on the that pattern. But I decide to make my own version and use the pattern as guidance. 

So here's the supplies : 
  1. Denim & Inner fabrics
  2. Old Zipper from unused bag (I decide to use zipper instead let the upper part open)
  3. Unused leather straps 
First thing to do it cut the fabrics. I use denim (Yeah! The same fabric as my pleated skirt) for the outside and the grey fabric for the inner part. For the measurement, I just follow the pattern and I add the top circles part. I didn't cut the denim fabric for the outside pockets, because I was thinking to use other fabric to give more pattern, but I still cant decide which fabric I want to use for the pocket. So, I skipped the outside pockets part and add a small pocket for my phone inside (with the grey fabric).


Let's start sewing! The first thing to do is putting the zipper. It's a little bit hard for me, because I usually use invincible zipper and this one it's not that kind of zipper. First, I stitch the zipper to the denim and the stitch again with the grey fabric on the top of the zipper. 


So, here's the result for one side of the zipper. I'm sorry becuase I'm not good explaining it in English ;p but I hope you understand what I mean. 

Next, before do the other side of the zipper, I need to stitch the inside pocket. I just realize that I cut the pocket part too small XD so I decide to serge (overlock) it.


Then pin it on the grey fabric (I deicide to put near the top of the bag, so my phone wont slide down when I carry the bag) and stitch it.

When you done, you can continue to stitch the other part of the zipper. And you will get a tube shape. Next, prepare the top and bottom part. Mum suggest to give hard fabric between the denim & grey fabric (I don't know what it's called). But it will make your fabric stay in shape (it's like the inner part of you collar). Too bad that hard fabric is not the one can stick to your fabric by ironing it. So I have to stitch it, so it wont moving around when I put it together with the tube part.


I have to stitcth the leather strap before joining the top & bottom part to the tube part. I decide to use the black leather strap. This is the hardest part, because the leather strap is thick. When you done with the strap, it's time to join the top & bottom part to the tube. Too bad I didn't take picture, but just follow the instructions from the Nigella pattern. 

You can serge the bottom and top part when you done of just leave it like that (it's inside anyway, noone can notice it ;p). You might notice that the zipper looks different, yes! It's because I change the zipper head to match with the copper accent on the black leather strap. Done! Now I have my proper yoga bag for my Manduka. Happy yoga time! Namaste. 

PS : I might reconstructing this bag, because the leather strap it's not good, I guess it will peel off soon and I might need to fix some of the stitches, rearrange the inside pocket and add the outer pockets.

Love, Ninu

Thursday, June 19, 2014

Few days ago, when I was looking for gift idea and I found this lovely Metal Hand Stamped stuff. I was thinking to buy it online, but it's bit pricey, and I think dad have that metal stamping tools at home. So, next I'm reading some blogs about how to make it your self and it looks easy ;p
source
Then I look more hand stamped stuff and everything just seems look nice. I want one! For sure! This will be nice person because you make it your self.
Source
I decide this will be the gift! First thing to do it, ask dad where he put it. Haha! I remember how he stamped all mum's baking pan with my name ;p Even some spoons have my name on it. This is would be fun weekend project ;)

Last night, I was searching that stamping letter in dad's storage. It was in small blue boxes (there are two boxes, one for letters and one for numbers). When I check it, it's already rusty XD but dad said I still can use it, and I can clean those rusty too. Since that stamped is really old (I think dad have it before I was born ;p) the letters only in regular caps font. I have no other option, maybe next time I go to hardware store, maybe I can find one with nice font. 

I was soo excited! I'm looking everything in the house, something metal that we don't really use, but I can't find anything. Until dad say, why don't try on mum's baking pan (haha! again! ;p) I took the small baking pan (mum have like twenty like this one) and dad show me how to do it. So, here's the first trial result ;p I didn't use black marker on it, consider mum will need this baking pan ;p It says "Practice makes perfect".


I think I should get some metal plates, or washer :p That's the easy one, because I don't know where I can get blank metal plate. So, if I'm not too lazy, I will buy some washer or blank plate (if I can find it) this weekend. ^^ Do you want to try to make your own hand stamped stuff?

Love, Ninu


Hallo! Last weekend, we went to beach for dad's family gathering. This time, we went to closest beach from our house, Kilang Mandiri Beach. We planned to leave earlier, so it's not too hot when we play at play the beach, but it was raining all morning XD. So we went there around 10 am, when the sun start shining too much.

Soon when we arrive (it's only like 10 minutes from home, by car), we look for place to put our stuff and then take Baby Z to sand! Yay! This time she didn't cry, but she still scared a bit with the water. Maybe she haven't get used to wet sand and water. The sand look more dark, because it was raining in the morning and there are some garbage around the beach.


She's not smiling, lol! Look at those faces. Seems like water bottle more interesting than the sand. She only laugh two times, it was when I say "Good! Let's play dirty!" and when my dad's friend come over and say hi.


After like 45 minutes, Baby Z start crying, maybe because she bored, so we took her back to her daddy. I was sitting down on the ground, and she can't stop pulling may hair XD. 

I think people at the beach more interesting that the phone XD this is the best selfie when made that day ;p Haha! 


Ow, I found something on the sand, I'm not sure it's a rock or not. But it have "Y" shape. Hehe! Y for Yes! Hehe..

Last but not least! Lunch time!! Finally! Haha! Baby Z was sleeping on the this table too while we eat ;p Haha! Lots of food! But I only eat this, grilled goat with lontong, veggies soup and some sausages. Nom! Nom!


It was fun day! Feels like we really have "summer holiday" :p How was your weekend?

Love, Ninu


Sunday, June 15, 2014

Few weeks ago, I posted a cake picture on my Instagram. It was boring weekend, and I feel like want to eat cake. So I decide to make cake, something chocolaty and can be served cold. Last time I made Lemon Frosted cake, it was frozen when you put it in fridge, because of it contains lots of butter. I decide to make Black Forest cake. As usual, I always make half from the recipe (just incase I ruin the cake, so I don't waste too much ingredients). Here's the recipe that I got from one of mum's recipe book and do some freestyle :p.

Choco Blueberry Cake (Black Forest Cake)


Cake Ingredients : 
6 Egg yolk
2 Egg white
60 gr Sugar
35 gr Plain Flour
13 gr Milk Powder
13 gr Corn Flour
8 gr Chocolate powder
75 gr Margarine
1 tsp Emulsifier
Chocolate paste

Filling, Whipped Cream & Topping Ingredient :
Instant Whipped cream
Blueberry Jam
Rhum & Simple syrup
Chocolate sprinkles & Oreo


How to :

Put the eggs (egg yolk & white egg), sugar and emulsifier into the mixer. Mix with high speed until it look pale, and feel soft and light (about 15 - 20 minutes).
While mixing it, in separate bowl, mix the dry ingredients (plain flour, corn flour, chocolate powder).
Put the margarine into the pan and heat it up until all melted. Don't forget to prepare the pan and pre-heat the oven at 250 degrees Celsius.
When the batter looks pale and fluffy, turn off the mixer. Add the dry ingredient in three additions. Mix it manually until you have smooth batter, then add chocolate paste & the melted margarine.
If you use sticky pan, don't forget to give margarine and cover it with some flour or you can use baking paper. Put the batter into the pan and place it in the oven for about 25 minutes. Don't open the oven until you see there's space between the pan and the cake or your cake will be fall down.
When it's done, take out the cake from pan and put in the plate, and let it cooling down.
Prepare the whipped cream. I use instant whipped cream. Put the instant powder into bowl, add some water or plain milk (see the instructions in the box) and mix it for 5 minutes.
Cut the cake into two parts, since I use square pan, I cut the cake into half and become rectangle.
Mix the rum with simple syrup and pour it into the cake. I use less rhum and more simple syrup because I don't really like the rhum aroma. I don't like dry cake, so I put one glass of the mixture for small cake.
Put the blueberry jam on the top of the cake (just one of them). Next layer will be the whipped cream. You can add black cherry before you put the whipped cream on the top of the blueberry jam (I don't have it atm ;p, so I skipped it). When you done, put the other part of the cake on it.
Use the rest of whipped cream to cover the cake, and sprinkle the chocolate sprinkles on it. Usually I use dark chocolate to decorate, but again, I don't have it ;p. I add some Oreo crushed on the top of the cake. And for the decoration, I use the Oreo biscuits. Done!

As you can see, the cake have light brown color (I did add lots of chocolate paste!). It's all because I spill the one and only one chocolate powder into the floor XD. You can add more chocolate powder (I think I supposed to add more chocolate powder).
But overall, it taste awesome! The cake really moist and soft ;) Haha! So happy I can finally make good cake that can be store in frigde without frozen. Hehe! 

Love, Ninu


Friday, June 6, 2014

Woohoo!! Practice On!! Finally my Manduka mat arrives yesterday! So Happy! I finally order new mat from Manduka Indonesia last week. Haha! Should have do it last year XD. I already saw this mat last year online, but didn't buy it because I thought it's pricey just for a mat. Nah! I was wrong.

Last year I got a yoga set from Body Sculpture for cheap price. I thought it feels slippery because it's still new. Haha! After 2-3 times try it at home, it still slippery XD. And I didn't use the other props (blocks, strap, eye mask & DVD), until now. Haha! What a waste! 

Like I said, I just start taking yoga class since last month. And I did use my slippery pinky mat. I thought it might "break in" if I often use it, but it didn't happen. Maybe because it's PVC mat, not TPE or rubber mat. Here is my old mat look like. 

Source
Before buy this new mat, I did another research for 2 weeks. The more I search the more I become confuse, lol! And the choices are between Manduka Ekolite, Jade Travel Mat, Cuca ECO-Care and YF Yoga mat. So the choice goes to Manduka Ekolite, even it's pricey but it's the best mat (based on online review, my friend and teacher review, too!). I was going to get Cuca ECO-Care, but it's only 100k different from Manduka Ekolite. Both are eco-friendly, but Manduka Ekolite made from natural rubber and biodegradable and Cuca made from TPE. After decide Manduka, I got another problem to choose the color (every colors look sooo pretty!). I even ask my friend opinion, lol. And decide to get the "Quest" or light blue.


The dark blue (Midnight) one is belong to my teacher, we order the mat together. He got the Super Ekolite one, that's why it's thinner than mine. On the package says "ultra grip sweaty + dry", so we will see, but I have no problem with sweat ^^. I never get extreme "drooling" sweat while workout.


Unwrap to feel the love ;) Hehe! First impression when I unwrap it, the color so pretty and it feel comfy when I touch it. 


It have nice stripy texture on it (just like what they mention on the website), for extra grip. One other thing that you might notice is the smell, it's really strong rubber smell. But it means it's made from real rubber and new rubber stuff always smell like that ;)


So, I put this mat in my bedroom so it can "breath" and the rubbery smell will be gone soon. But it makes my whole bedroom smells like rubber, haha! So, light on the candle, smell better ;) Another good thing from this mat is easy to roll up ;). It's like stick when I rolling it up, not like my old mat, I have to struggling when I try to rolling it into small roll to fit the mat bag.


See, after  I roll it up, my pink mat start unrolled my itself and become bigger, lol. Maybe because that pink mat didn't have grip, hehe. So, bye-bye to pinky mat (mum already ask my old mat, she want to reuse it as something else, not for yoga practice ;p). I can't wait to try this blue things this Sunday ;) Namaste!

Love, Ninu


Wednesday, June 4, 2014


So, yesterday was yoga time. Usually I will wear something comfy and no heels on yoga day. But yesterday, I planned to meet our customers, so I have to dressed up well. I don't feel like to wear jeans, so I decide to wear my pleated skirt with white shirt. By the time I get out from my room, my sister-in-law, spontaneously tell Baby Z, "Aunty looks like high school student". LOL! Then I look at the mirror, Maybe she's right, lol! White shirt with skirt ;p
I grab my jacket, and again she say something, "Now you look like JKT48 member, don't forget to wear your boots aunty", WAHAHA! Ai takata, ai takata, Hoi! Hoi! LOL. I actually want to wear my boots, but I already wear it yesterday. I don't want to wear it again today. I saw on TV, they said, don't wear the same shoes everyday, it's not only about fashion but it will make your shoes life more longer. It's true, because I just broke my favorite pump shoes last week XD. 

Hmm, maybe this heels didn't match with the outfit, but at least it looks fine ;) So, how do you look today?

Love, Ninu


Sunday, June 1, 2014


See the jungle through the eagle eyes, what an epic title ;p That's what I felt when I finally able to visit The Canopy Bridge in Bangkirai Forest. It was sunny day, me, my sister, and our friend from South Korea come to visit us, in here! Yea! In Balikpapan. Lets, meet Jihyun and his 4 years old Jungle!


Maybe some of you must be wondered how do I know her, hehe! She was one of  my hosts from Couchsurfing while I visit South Korea last year (I haven't post anything about my Seoul travel XD). She planned to travel around Indonesia for 2 or 3 months with his cute son. And I was so exciting when they finally got a chance to visit us!

So, our journey starts on Saturday morning. Driving out of city, to go to some places. First place was the KWPLH. I've been to that place before, so I will skip that place. Our second place is the Bukit Bangkirai. I never been to this place my whole life, lol. At first, we (me and the driver) thought we are lost, because all we see only trees and some sign to Petung, not Bukit Bangkirai, lol.


There are some cars in fron of us, so we decide to follow them (we assume that they are going to the same place, because we meet them before at KWPLH). We was stuck about 1 hour after we see the first sign. Because there's a big hole in the road and the car in front of us can't go, until they put some wood in it. It was long drive until we see the sign (finally!) 


From that gate, it's about half hour to our destination XD. After we reach our destination, it was super hot and we all exhausted. We plan to have lunch at restaurant, but the food not ready yet (what?! T_T) We almost cancel this trip, because there's a rule kid's under 5 year old can't go to the canopy bridge and the canopy bridge seems far. We can't take stroller and Jungle have to walk, that's the problem. I ask the officer how far, and he said its about 1-2 hours. What?!? Jihyun already give up, I told her, we came this far to go to canopy bridge, let me ask the officer again. And finally, after clear instruction, the officer said, kids can go with adult, and the first canopy birdge only 500 meter from our place now, lol (So, that 1-2 hours walk was how long you want to stay around the canopy bridge, haha!) Soo, here we go!!


There's something funny happened when we start walking. Jungle was so happy, and he was dancing and fell down. Hehe.. I'm trying to upload the video, but the connection too slow XD.


He doesn't want to go down. Haha! That's what he do, trying to push the tree, lol! Before we go down stairs, he stuck his head in the fences. He said "mummy, look I can slide my head", few minutes later he said "mummy, I can't take out my head" XD. We was worry if he can't take it out and stuck here. But finally! He can! Yay! Too bad I didn't take picture (Jihyun took a pic). Maybe should ask her the pic and update here.


This is what I mean by see the jungle through eagle eyes ;) What a beautiful view from up here :) This bridge was build with american constructions. And it already established for years.


I really miss this little guy :) He is so funny, even we can't talk, lol! Because he only speak a little english and I can't speak korean, haha! 

So it was fun day at Bukit Bangkirai. Maybe next time will have to explore all the track ^^

Love, Ninu